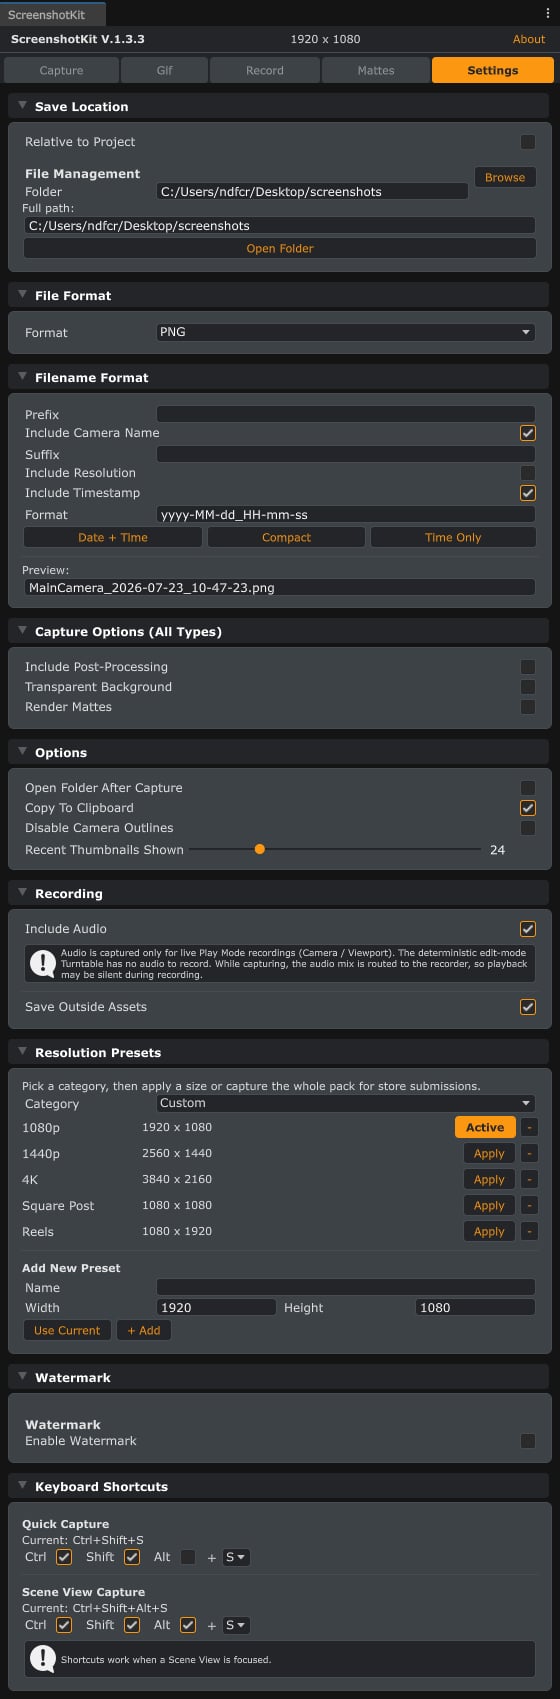
The Settings tab: save location, file format, filename template, capture options, general options, recording, resolution presets, watermark, and keyboard shortcuts.
Save Location
- Relative to Project: treat the folder as project-relative (inside
Assets/) rather than absolute. - Folder: where screenshots are written. Defaults to
Assets/ScreenshotKit/Screenshots. Click Open Folder to verify.
File Format
- Format: PNG, TGA, JPEG, or EXR (see Image Formats).
- JPEG exposes a quality slider; EXR exposes Compression (None / ZIP / RLE) and 32-bit Float for full HDR output.
Filename Format
Prefix, suffix, camera name, resolution, and timestamp tokens, with a live preview. See Filename Format.Capture Options (All Types)
- Include Post-Processing: whether captures include post-processing effects.
- Transparent Background: capture with an alpha channel (see Transparent PNG for the alpha source modes).
- Render Mattes: render every enabled matte pass alongside each capture (see Cryptomatte & AOV).
Options
- Open Folder After Capture: pops the OS file explorer at the output path after every shot. Handy when iterating, distracting in long batches.
- Copy To Clipboard: also place each capture on the OS clipboard (on by default). Screenshots are copied as an image; GIFs and videos are copied as a file drop, ready to paste into Explorer, Discord, and the like. On Windows the image clipboard holds both a universal bitmap and a PNG, so transparency survives pasting into apps that support it. macOS and Linux support is editor-only and best-effort (Linux needs
xclipon the PATH). - Disable Camera Outlines: turn off the emerald Render Camera markers, both the always-on outline around the camera dropdowns and the camera name tint in the Hierarchy window.
- Recent Thumbnails Shown: how many of the most recent screenshots the Capture tab’s Recent Screenshots panel displays (1 to 100).
Recording
- Include Audio: include game audio in live video recordings.
- Save Outside Assets: write videos outside the
Assets/folder so Unity does not import them. - Use ffmpeg: encode live recordings through your own ffmpeg on a background process instead of Unity’s built-in encoder, for far less impact on game performance plus hardware codecs. ffmpeg Path accepts your ffmpeg folder or the executable itself, or stays empty to use the system PATH; the tab shows exactly which binary will run, with a Download ffmpeg button if you have none. Codec picks H.264, H.264 (NVENC), HEVC (NVENC), or VP9 (the container follows the codec), and Extra Args appends custom ffmpeg output arguments. Opaque live takes only; whenever ffmpeg cannot start, recordings fall back to the built-in encoder automatically. See Video Recording for the full workflow.